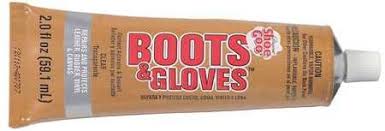
Shoe GOO 110610 Boots and Gloves Adhesive,2 fl oz,Clear
- This product is highly durable
- The product is manufactured in United States
- The product is easy to use
$7.95
When my favorite hiking boots started separating at the sole last summer, I nearly tossed them in the trash. Three years of mountain trails, muddy campsites, and rainy day adventures had finally taken their toll. The same week, the fingertip of my trusty work gloves split open while I was building a fence. Rather than shell out hundreds for replacements, I discovered something that would completely change my approach to gear maintenance: Shoe Goo Boots And Gloves. What started as a desperate attempt to save my boots turned into a revelation that no outdoor enthusiast or working professional should ever be without this specialized adhesive in their repair kit.
I’ve since become something of a Shoe Goo evangelist, fixing everything from my wife’s gardening gloves to my kids’ soccer cleats. Through trial, error, and countless repairs, I’ve compiled this comprehensive guide to help you get the most out of this remarkable product.
What Exactly Is Shoe Goo Boots And Gloves?
Before diving into specific applications, let’s clarify what makes this product special. Shoe Goo Boots And Gloves is a specialized variant of the original Shoe Goo adhesive, specifically formulated for the unique challenges presented by boots and gloves. While the original Shoe Goo has been around since the 1970s (initially created to extend the life of skateboard shoes), this specialized formula addresses the particular stresses and materials found in more heavy-duty applications.
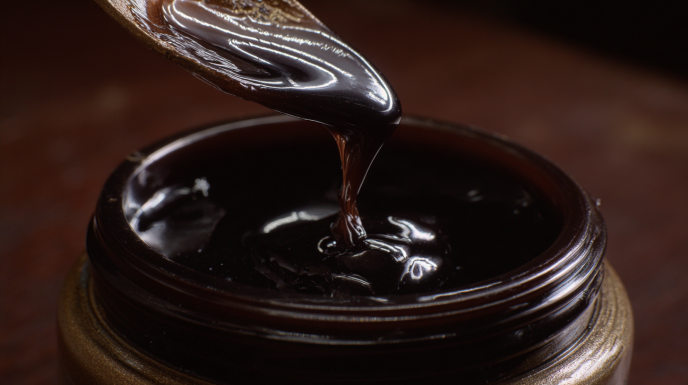
The product comes in a squeeze tube and has a thick, gel-like consistency that might remind you of silicone caulk. It’s typically clear or slightly amber in color, though some specialized versions come in black or other colors to match different materials. What makes it truly special is its unique chemical composition that allows it to remain flexible after curing while still maintaining incredible strength.
How Shoe Goo Boots And Gloves Differs from Regular Shoe Goo
Many people wonder if they can just use regular Shoe Goo for their boots and gloves. While the original formula works decently for many applications, the specialized Boots And Gloves variant offers several significant advantages:
- Enhanced flexibility to withstand the extreme bending and movement typical of work boots and gloves
- Higher resistance to temperature extremes, making it suitable for outdoor gear
- Improved waterproofing properties specifically designed for footwear and hand protection
- Stronger bonding capabilities with leathers, heavy rubbers, and technical fabrics
- Better abrasion resistance for high-wear areas
I learned this distinction the hard way when I initially repaired my wife’s riding boots with regular Shoe Goo, only to have the repair crack after just a few wears. When I redid the same repair with the Boots And Gloves formula, it lasted an entire season of horseback riding.
The Repair Arsenal: What Can Shoe Goo Boots And Gloves Fix?
The versatility of this product continues to amaze me. Here’s a comprehensive breakdown of what I’ve successfully repaired over the past year:
Boot Repairs
- Separated soles: This is perhaps the most common boot failure and where Shoe Goo Boots And Gloves truly shines. It creates a bond often stronger than the original manufacturing adhesive.
- Cracks and splits in leather: By working the adhesive into cracks and allowing it to cure, you can prevent further deterioration.
- Worn heel areas: Building up layers can restore worn-down heels.
- Punctures and holes: Perfect for sealing unexpected damage from sharp objects.
- Waterproofing seams: Applying a thin layer along seams creates an effective water barrier.
Glove Repairs
- Split fingertips: This common failure point is easily fixed with a small application.
- Palm reinforcement: Adding a layer to high-wear areas extends glove life dramatically.
- Seam failures: Reinforcing stitching prevents further unraveling.
- Grip enhancement: Strategic application can improve grip on work gloves.
- Tears in fabric or leather: Even substantial tears can be bonded back together.
The diversity of materials it works with is equally impressive: leather, rubber, vinyl, canvas, most synthetics, and even Gore-Tex (though with some limitations). The only materials I’ve found it doesn’t bond well with are silicone, some specialized plastics, and extremely oily leathers without proper preparation.
The Science Behind the Stick: Why It Works So Well
What makes Shoe Goo Boots And Gloves so effective is its unique polyurethane-based formula. Unlike cyanoacrylate adhesives (super glues) that create a hard, inflexible bond, or epoxies that can crack under repeated stress, this formulation cures into a rubber-like material that maintains flexibility while creating powerful adhesion.
The polymer chains in the adhesive actually interlock with the material fibers, creating both a mechanical and chemical bond. This dual-bonding approach is why it works so well on porous materials like leather and canvas. For non-porous surfaces like rubber, the adhesive creates a vacuum seal that, once cured, resists separation even under stress.
The waterproofing capability comes from the hydrophobic nature of the cured adhesive, which actively repels water molecules rather than simply creating a barrier. This is why it’s particularly effective for boots that frequently encounter wet conditions.
My Step-by-Step Application Guide
Through much experimentation, I’ve refined my application process to ensure maximum durability. Here’s my tried-and-true method:
Preparation (The Most Critical Step)
- Clean thoroughly: Remove all dirt, oil, and previous adhesive residue using rubbing alcohol or acetone. This cannot be overstated—even invisible contaminants will prevent proper bonding.
- Rough up smooth surfaces: For slick materials, lightly sand with fine-grit sandpaper to create a better bonding surface.
- Dry completely: Ensure there’s absolutely no moisture present before application.
- Tape off areas: Use masking tape to create clean lines and prevent excess adhesive from spreading where you don’t want it.
Application Techniques
- Less is more initially: Apply thin layers rather than one thick glob.
- Use the right tools: Popsicle sticks, toothpicks, or small plastic spreaders offer more control than applying directly from the tube.
- Press firmly: For separations, press the surfaces together firmly after application.
- Build up layers: For worn areas, apply multiple thin coats, allowing each to partially cure before adding the next.
- Create texture: For grip areas, create intentional texture by dabbing with a cloth while partially cured.
Curing Process
This is where patience becomes crucial. While Shoe Goo Boots And Gloves becomes tacky fairly quickly (15-30 minutes), complete curing takes 24-72 hours depending on humidity and application thickness. I’ve found these approaches helpful:
- Use clamps or heavy objects to hold separated parts together during initial curing
- Avoid moisture contact during the entire curing period
- Allow longer curing times in humid environments
- Keep repaired items at room temperature for optimal curing
A common mistake I made early on was testing the repair too soon. Even though the surface might feel dry, the interior of thicker applications may still be curing. Give it the full recommended time for maximum strength.
Material-Specific Applications
Different materials require slightly different approaches for optimal results:
Leather Applications
Leather poses unique challenges due to its porous nature and natural oils. I’ve found these steps essential:
- Clean with a leather-specific cleaner to remove conditioning oils
- Allow to fully dry (24+ hours for thick leather)
- Apply a thinner coat than you would with other materials
- Consider using the black variant for dark leathers for better cosmetic results
My cowboy boots received this treatment around the welt where the stitching had started to fail, and after proper preparation, the repair has lasted through multiple rainstorms and hundreds of miles.
Rubber and Synthetic Materials
These materials generally bond exceptionally well with Shoe Goo Boots And Gloves, but require:
- Thorough degreasing with alcohol
- Light sanding for smooth rubber surfaces
- A slightly thicker application than with leather
My rubber rain boots had developed a crack right across the toe bend. After repair, not only did the crack seal completely, but the reinforced area has proven more durable than the original material.
Canvas and Fabric
For these materials, the adhesive tends to soak in, so:
- Apply from both sides when possible
- Use slightly more than you think you need
- Press the fabric into the adhesive rather than the reverse
I saved my canvas work gloves by reinforcing the area between thumb and forefinger, building up several thin layers for flexibility while adding significant durability.
Waterproofing Applications
One of the most valuable uses I’ve found is for waterproofing. Unlike spray-on treatments that need frequent reapplication, a strategic application of Shoe Goo Boots And Gloves creates a permanent waterproof barrier.
For my hiking boots, I applied a thin bead along all the seams where the upper meets the sole, as well as around the tongue attachment points. Even after trekking through spring runoff in the mountains, my feet stayed completely dry.
The technique differs slightly from structural repairs:
- Apply a very thin, continuous bead along seams
- Use a finger (with a disposable glove!) to smooth it flat
- Focus on stitching holes and material junctions
- Allow full curing in a dry environment before testing
This approach has saved me from purchasing new boots several times over, especially with leather hiking boots that tend to leak at the flex points first.
Common Mistakes and How to Avoid Them
Through my repair journey, I’ve made just about every mistake possible. Learn from my failures:
- Insufficient cleaning: Skipping proper degreasing leads to premature failure. Take the extra time.
- Using too much adhesive: Thick applications take forever to cure and often crack. Multiple thin layers work better.
- Moving items during curing: This breaks the forming bonds. Set it and forget it until fully cured.
- Ignoring manufacturer directions: The specific curing times exist for a reason.
- Poor surface preparation: Smooth surfaces need roughening for proper adhesion.
- Applying in high humidity: The curing chemistry works best in dry conditions.
- Expecting instant results: Full strength develops over days, not hours.
My most memorable failure involved repairing my work boots on a rainy day in the garage. The humidity prevented proper curing, and the repair failed the next day. When I redid it in controlled conditions, the same repair has lasted months of daily wear.
Limitations: When Not to Use Shoe Goo Boots And Gloves
While impressively versatile, there are situations where other solutions might be more appropriate:
- Structural failures in safety equipment: Don’t risk your safety—replace items where failure could cause injury.
- Extremely thin materials: The adhesive’s thickness can change the feel and function of very delicate materials.
- Areas with extreme heat exposure: While heat-resistant, direct flame contact will degrade the bond.
- Aesthetic-critical repairs on visible areas: Though functional, it’s difficult to achieve factory-perfect appearance.
- Extremely oily leathers: Some exotic leathers simply won’t allow proper bonding.
When my firefighter friend asked about repairing his protective gloves, I advised against it. Some equipment is designed with intentional failure points and should be replaced according to manufacturer guidelines.
Long-Term Durability: What to Expect
After dozens of repairs, I can confidently report on long-term performance. Properly applied Shoe Goo Boots And Gloves repairs typically fall into three durability categories:
- Structural repairs (sole reattachment, major seams): 6-12 months of regular use
- Reinforcement applications (wear areas, stress points): Often outlasts the original material
- Waterproofing applications: 3-6 months before potential touch-ups needed
The most impressive longevity I’ve witnessed was with my leather work gloves. After reinforcing the palm area with a thin layer, that section has outlasted the rest of the glove by months, even with daily construction work.
Removal Techniques When Needed
Sometimes you need to remove previous applications, either to redo a repair or because you’ve changed your mind. I’ve tested various removal methods with these results:
- Mechanical removal: For fully cured adhesive, carefully scraping with a plastic tool works best.
- Freezing method: Placing the item in the freezer makes the adhesive more brittle and easier to remove.
- Chemical removal: Acetone works but can damage some materials. Test in an inconspicuous area first.
- Heat application: Careful application of heat (hair dryer) can soften the bond for removal.
When I needed to redo a repair on my hiking boot toe cap, I found the freezer method followed by gentle scraping with a plastic putty knife removed the old adhesive without damaging the leather.
Safety Considerations
While generally safe to use, some basic precautions should be observed:
- Ventilation: Always apply in a well-ventilated area as the solvents are potent.
- Skin contact: Avoid direct skin contact; it’s extremely difficult to remove from skin.
- Tool cleaning: Clean tools immediately with acetone before the adhesive cures.
- Storage: Keep away from heat sources and seal tightly between uses to prevent drying.
I learned the skin-contact lesson the hard way—spending an evening with my fingers stuck together until the adhesive gradually wore off over days. Now I always keep disposable nitrile gloves handy for application.
Cost Analysis: The Value Proposition
Let’s talk dollars and sense. A typical tube of Shoe Goo Boots And Gloves costs between $6-10 depending on where you purchase it. Consider these comparisons from my personal experience:
- Resoling hiking boots professionally: $60-100
- New quality work boots: $150-300
- Professional-grade work gloves: $25-50
- Waterproofing treatment for boots: $15-20 per application
One tube has allowed me to:
- Repair 3 pairs of boots
- Fix 4 pairs of gloves
- Waterproof 2 pairs of hiking boots
- Reinforce high-wear areas on my kids’ sports equipment
That’s easily $400+ in replacement costs avoided with a $10 product. The value proposition becomes even more compelling when you consider that some of these items might have been irreplaceable (like my perfectly broken-in hiking boots).
Where to Buy Quality Shoe Goo Boots And Gloves
After trying several sources, I’ve found the product quality can vary by retailer. The freshest product (which applies and cures best) typically comes from:
- Dedicated outdoor retailers
- Shoe repair shops
- Some hardware stores with high turnover
- Online directly from the manufacturer
I’ve had less success with tubes purchased from discount stores or that have been sitting on shelves for extended periods. The product does have a shelf life, even unopened, so checking production dates when possible is worthwhile.
Comparing to Other Adhesive Options
Many people ask how Shoe Goo Boots And Gloves compares to other popular adhesives. Here’s my experience-based comparison:
- vs. E6000: Less initial grab but better flexibility and water resistance
- vs. Gorilla Glue: Less expansion but better for flexible materials
- vs. Contact cement: Easier application and better long-term flexibility
- vs. Super glue: Much more flexible and durable for materials under stress
- vs. Epoxy: Better for porous materials and maintains flexibility
When my fishing buddy used epoxy to repair his waders while I used Shoe Goo Boots And Gloves on mine, the difference was remarkable. His repair cracked after a few uses, while mine remained intact for the entire season.
Specialized Applications Beyond the Basics
Beyond standard repairs, I’ve discovered some creative uses that showcase the product’s versatility:
- Creating custom grip surfaces on tool handles by applying and texturing
- Waterproofing tent seams for camping in heavy rain
- Reinforcing backpack strap attachment points before they fail
- Adding cushioning to boot pressure points
- Sealing leaks in rubber dry bags and waterproof containers
My favorite creative application was adding custom grip pads to my winter gloves for better handling of camera equipment in cold weather—something no commercially available product offered.
My Personal Repair Success Stories
Let me share a few specific repairs that truly showcase what this product can do:
The Irreplaceable Hiking Boots
My Vasque hiking boots had been discontinued, and after five years, the sole began separating at the toe. Using Shoe Goo Boots And Gloves, I:
- Thoroughly cleaned both surfaces
- Applied a thin layer to both the sole and upper
- Pressed together and clamped overnight
- Added a protective layer along the seam
Three mountain hiking trips later, including one in pouring rain, the repair is holding perfectly. The bond appears stronger than the original factory adhesive.
Work Glove Resurrection
My leather work gloves had worn through at the fingertips and palm—typically a death sentence for gloves. I:
- Cleaned the areas thoroughly
- Applied a thin layer to the inside of the worn areas
- Built up three successive layers, allowing partial curing between each
- Added a textured final layer for grip
These repaired gloves have now outlasted a new pair I purchased around the same time, with the reinforced areas showing minimal wear despite daily use.
Emergency Field Repair
While camping 12 miles from the trailhead, my boot sole started separating dramatically. With only a small tube of Shoe Goo Boots And Gloves in my repair kit, I:
- Used alcohol wipes to clean both surfaces
- Applied the adhesive along the separation
- Used duct tape to hold it together overnight
- Removed the tape in the morning
That emergency repair got me back to the trailhead without issue and, surprisingly, is still holding months later, though I did redo it properly once home.
Maintenance After Repair
To maximize the lifespan of your repairs, some basic maintenance helps:
- Inspect regularly: Check repairs for early signs of failure and touch up as needed.
- Clean carefully: Use gentle cleaning around repaired areas.
- Apply leather conditioner sparingly: Avoid saturating repaired areas on leather items.
- Store properly: Keep repaired footwear and gloves in moderate temperature and humidity.
I’ve found that repairs maintained this way often last far longer than expected. My work boot toe guard repair has received small touch-ups every few months and has now lasted over a year of daily construction site abuse.
Environmental Considerations
While not the most eco-friendly product due to its chemical composition, Shoe Goo Boots And Gloves does provide environmental benefits through product lifespan extension. By keeping usable items out of landfills, you’re reducing your overall environmental impact.
To minimize environmental concerns:
- Use only what you need
- Dispose of tubes and waste properly
- Clean tools with minimal solvent
- Consider the repair-versus-replace impact
I’ve kept at least seven pairs of boots and countless gloves from entering the waste stream over the past two years—a significant reduction in my personal footprint.
Final Thoughts: Why Every Gear User Needs This Product
After countless repairs and experiments, I’m thoroughly convinced that Shoe Goo Boots And Gloves is an essential item in any outdoor enthusiast’s or working professional’s toolkit. The combination of flexibility, durability, and waterproofing capability makes it uniquely suited to extending the life of expensive and essential gear.
Beyond the cost savings, there’s something deeply satisfying about repairing rather than replacing. Those boots that have perfectly molded to your feet, the gloves that have developed just the right feel—these items deserve a second life rather than a trip to the landfill.
Whether you’re an occasional hiker, a dedicated tradesperson, or simply someone who appreciates getting maximum value from your purchases, I can’t recommend this product highly enough. It has transformed my approach to gear maintenance and saved me hundreds, if not thousands, in replacement costs.
So the next time you notice your favorite boots starting to separate or your trusted work gloves wearing thin, reach for Shoe Goo Boots And Gloves before reaching for your wallet. Your gear—and your budget—will thank you.