Eclectic Shoe Goo Adhesive Glue, Shoe Repair, Clear, 110010, 3.7 fl. oz.
- The Eclectic Shoe Goo Adhesive Glue is a clear, 3.7 fl. oz. shoe repair adhesive that bonds, protects, and rebuilds for a permanent repair. It is abrasion-resistant and works well on various shoe materials, including leather, rubber, vinyl, canvas, and more. The glue is waterproof , dries clear , and can be painted after 24 hours. It is ideal for fixing worn soles, damaged heels, and protecting sports shoes from turf-tear damage. Additionally, it can be used to create extra traction and seal waders or rubber boots. The adhesive provides a strong, long-lasting bond and is suitable for heavy-use items.
$4.96
I still remember staring hopelessly at my favorite pair of white canvas sneakers. They had served me faithfully through countless city adventures, but now sported an unmistakable hole at the toe where canvas met rubber. Ready to reluctantly toss them in the donation pile, I made one last desperate internet search. That’s when I discovered what would become my secret weapon in the battle against premature footwear retirement: Shoe Goo Clear.
Five years and dozens of successful shoe resurrections later, I’m sharing everything I’ve learned about this remarkable product. From proper application techniques to surprising alternative uses, consider this your comprehensive field guide to mastering Shoe Goo Clear.
What Exactly Is Shoe Goo Clear and What Makes It Special?
Before diving into the how-to’s, let’s talk about what this miracle product actually is. Shoe Goo Clear is a specialized adhesive designed specifically for footwear repair. While the original Shoe Goo has been around since the 1970s (originally popular in skateboarding circles for extending the life of constantly-abraded skate shoes), the clear version offers all the same bonding power with one crucial difference: transparency.
Shoe Goo Clear is essentially a urethane rubber compound that creates a flexible, waterproof bond when cured. Unlike standard adhesives that simply stick things together, Shoe Goo actually becomes part of the shoe structure, creating a durable repair that can withstand the constant flexing, impact, and abrasion that footwear endures.
What sets the clear version apart from standard black or white Shoe Goo is its ability to blend invisibly with the original shoe material when properly applied. This makes it ideal for repairs on light-colored or multi-colored shoes where a visible repair patch would be unsightly.
The true value of Shoe Goo Clear lies in its unique combination of industrial-strength durability and aesthetic invisibility when repairing beloved footwear. It’s like having professional-grade shoe repair capabilities in a humble tube.
Clear vs. Classic: Understanding the Difference Between Shoe Goo Varieties
When I first entered the Shoe Goo world, I was confused by the different varieties available. Through trial and error (and some regrettable early repair attempts), I’ve learned the key differences between Shoe Goo Clear and other versions:
Shoe Goo Clear:
- Dries transparent (with a slight amber tint on thick applications)
- Ideal for visible repairs on light-colored shoes
- Perfect for multi-colored patterns where black or white would stand out
- Slightly thinner consistency than original Shoe Goo
- Shows less obviously on textured materials
Original Shoe Goo (typically black):
- Provides slightly better abrasion resistance
- Ideal for high-wear areas like soles and heels
- Works better for rebuilding completely worn areas
- Slightly thicker consistency for gap-filling
- More obvious on light-colored materials
White Shoe Goo:
- Good for white athletic shoes and sneakers
- Can be mixed with Clear for custom opacity
- May yellow slightly over time with UV exposure
- Works well on canvas shoes
I keep all three varieties in my repair kit because each has its specific strength. For my white running shoes, I sometimes blend clear and white for the perfect match. For rebuilding worn-down soles on hiking boots, black is still my go-to. But for nearly every other repair, especially anything visible on the upper portion of shoes, Clear has become my default choice.
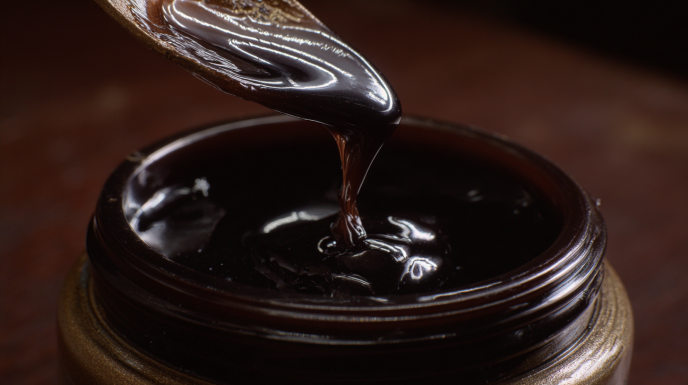
The Transparency Test: How Clear Does Shoe Goo Clear Actually Dry?
When I first used Shoe Goo Clear, one of my biggest questions was exactly how transparent it would dry. Marketing claims and reality don’t always align, especially with adhesives. After dozens of applications on various materials, here’s what I can tell you about the final appearance:
On thin applications (under 1mm):
- Nearly invisible on most materials
- Completely transparent with a very slight sheen
- No yellowing over time if properly applied
On medium applications (1-2mm):
- Mostly transparent with a slight amber tint
- Creates a visible glossy area
- May yellow slightly with prolonged UV exposure
On thick applications (over 2mm):
- Noticeable amber/yellowish tint
- Definitely visible but still translucent
- More prone to yellowing with age
I learned this lesson the hard way when repairing a large hole in my favorite slip-on shoes. I applied Shoe Goo Clear too thickly in one application, resulting in a noticeable yellowish patch. Since then, I’ve adopted a “thin layers” approach, allowing each layer to partially cure before adding the next. This technique results in nearly invisible repairs even with substantial reinforcement.
The transparency also varies slightly depending on the material you’re applying it to. On smooth surfaces like leather or vinyl, it maintains maximum clarity. On porous materials like canvas or mesh, it tends to soak in slightly, creating a more integrated appearance.
Application Artistry: Mastering the Perfect Shoe Goo Clear Technique
Over years of trial and error, I’ve developed what I consider the optimal application method for Shoe Goo Clear. This approach maximizes transparency while ensuring durability:
Step 1: Preparation
- Clean the repair area thoroughly with rubbing alcohol and allow to dry completely
- Rough up smooth surfaces slightly with fine sandpaper for better adhesion
- Mask off areas you want to protect using painter’s tape
- Gather your application tools: toothpicks, popsicle sticks, plastic wrap, and disposable gloves
Step 2: Application for Different Repair Types
For Sole Separation:
- Apply a thin, even layer of Shoe Goo Clear to both surfaces
- Wait approximately 2 minutes until slightly tacky
- Press surfaces together firmly
- Wipe away any squeeze-out immediately with a cloth dampened with mineral spirits
- Use rubber bands or clamps to maintain pressure while curing
For Reinforcing Worn Areas:
- Apply a very thin initial layer of Shoe Goo Clear
- Allow to become tacky (about 5-10 minutes)
- Apply a second thin layer, smoothing with a water-dampened finger inside a plastic bag
- For maximum durability with minimal visibility, repeat with additional thin layers rather than one thick application
For Filling Holes:
- If the hole goes all the way through, back it with a small piece of wax paper
- Apply Shoe Goo Clear in thin layers, allowing each to become tacky before adding the next
- For the final layer, smooth with a water-dampened finger in a plastic bag
- Once partially cured (about 30 minutes), remove any backing material
I once saved my daughter’s favorite light blue ballet flats using this layered approach. She had worn a hole right through the toe area, but by building up five micro-thin layers of Shoe Goo Clear, I created a repair that was both invisible and durable enough to withstand another six months of daily wear.
The Waterproof Question: Can Shoe Goo Clear Really Keep Water Out?
Living in the Pacific Northwest has given me plenty of opportunities to test the waterproofing capabilities of Shoe Goo Clear. After countless rainy day commutes and deliberately stepping in puddles (all in the name of product testing, of course), I can confidently report that yes, properly applied and fully cured Shoe Goo Clear is genuinely waterproof.
In fact, I’ve used it specifically as a waterproofing measure on several pairs of shoes:
- Sealing the seams on canvas sneakers
- Reinforcing stitch holes on leather boots
- Creating a waterproof barrier on mesh running shoes
- Sealing small cracks in rubber rain boots
My most impressive waterproofing success was with a pair of leather dress shoes that had developed cracks along the welt (where the upper meets the sole). After cleaning thoroughly and applying a thin bead of Shoe Goo Clear along the entire welt, I was able to transform them from “avoid all puddles” to “bring on the downpour” status.
The key to successful waterproofing is ensuring complete coverage with no gaps or air bubbles, and allowing full cure time before exposure to moisture. When properly applied, Shoe Goo Clear creates a continuous waterproof membrane that water molecules simply cannot penetrate.
The Color Chameleon: Using Shoe Goo Clear Across the Color Spectrum
One of the primary advantages of Shoe Goo Clear is its versatility across different colored footwear. While black Shoe Goo works well on dark shoes and white Shoe Goo is fine for white shoes, neither is ideal for the vast range of colored and patterned footwear many of us own.
I’ve successfully used Shoe Goo Clear on shoes in practically every color of the rainbow:
- Vibrant red running shoes
- Pastel pink ballet flats
- Navy blue boat shoes
- Bright yellow rain boots
- Multi-colored patterned sneakers
- Brown leather dress shoes
- Teal canvas slip-ons
On light-colored shoes, Shoe Goo Clear maintains its transparency beautifully. On darker colored shoes, it blends into the background, becoming nearly invisible when properly applied in thin layers.
My most challenging color test was repairing a tear in my son’s galaxy-print sneakers – a swirling pattern of purples, blues, and black with white stars. I was concerned the repair would create a glossy “dead spot” in the pattern, but by applying Shoe Goo Clear in micro-thin layers and dabbing the final layer with a textured cloth while still tacky, I was able to maintain both the color pattern and the fabric texture.
The key takeaway: Shoe Goo Clear works on virtually any color shoe, but the application technique should be adjusted based on the base color and material texture.
The Waiting Game: Understanding Shoe Goo Clear’s Drying and Curing Timeline
Patience isn’t always my strongest virtue, especially when I’m eager to wear my newly repaired favorite shoes. However, I’ve learned through disappointing experiences that rushing the Shoe Goo Clear curing process is a recipe for repair failure.
Here’s the realistic timeline I now follow:
- Initial set time: 5-10 minutes (becomes tacky)
- Safe to handle: 2-4 hours (won’t stick to other surfaces)
- Partial cure: 24 hours (can withstand light use)
- Full cure: 48-72 hours (maximum strength and durability)
Factors that affect curing time include:
- Humidity (higher humidity typically speeds curing)
- Temperature (warmer temperatures accelerate curing)
- Application thickness (thicker applications take longer)
- Material type (porous materials may speed initial curing)
- Airflow (good circulation helps solvent evaporation)
I’ve developed a simple trick to test if Shoe Goo Clear has fully cured: gently press your fingernail into an inconspicuous part of the repair. If it leaves any indentation whatsoever, it needs more curing time. Fully cured Shoe Goo Clear should feel firm yet slightly flexible, similar to a rubber eraser.
After ruining several early repairs by being impatient, I now have a dedicated “curing shelf” in my garage where repairs sit undisturbed for a full 72 hours. The difference in durability between a rushed 12-hour cure and a proper 72-hour cure is remarkable and well worth the wait.
Material Matchmaking: Which Surfaces Work Best with Shoe Goo Clear?
One of Shoe Goo Clear’s greatest strengths is its versatility across different shoe materials. However, I’ve found it performs better on some surfaces than others.
In my experience, from best to good compatibility:
Excellent Compatibility:
- Rubber (natural and synthetic)
- Canvas
- Leather (smooth and suede)
- Vinyl
- TPR (thermoplastic rubber)
- EVA foam (ethylene-vinyl acetate)
- Nylon
Good Compatibility:
- PVC
- Polyurethane
- Mesh fabrics
- Gore-Tex and waterproof membranes
- Synthetic leathers
- Neoprene
Limited Compatibility:
- Silicone (requires special primer)
- Teflon-coated materials
- Extremely oily leathers
- Some thermoplastics
I’ve had particularly good results using Shoe Goo Clear on the rubber-to-canvas junction in sneakers, which is a common failure point. The adhesive bonds strongly to both materials, creating a flexible, durable repair at this high-stress area.
For materials with limited compatibility, I’ve found that surface preparation makes a huge difference. Thorough cleaning with alcohol, light sanding, and in some cases applying a thin layer of compatible primer can transform a potentially failed repair into a lasting one.
Hole-In-One: Repairing Small Punctures and Tears with Shoe Goo Clear
Small holes in shoes are perhaps the most common repair I tackle with Shoe Goo Clear. Whether it’s a hole worn through the toe of canvas sneakers, a puncture in leather uppers, or a tear in mesh running shoes, the clear version excels at invisible repairs.
My proven technique for hole repair depends on the size and location:
For tiny holes (under 5mm):
- Clean thoroughly and dry completely
- Apply a small amount of Shoe Goo Clear from the inside of the shoe
- Smooth it flat with a popsicle stick
- Allow to become tacky (5-10 minutes)
- Apply a second thin layer from the outside
- Smooth with a water-dampened finger inside a plastic bag
For medium holes (5-15mm):
- Clean thoroughly and dry completely
- If the hole goes through the shoe, back it with wax paper
- Apply Shoe Goo Clear in multiple thin layers, allowing each to become tacky
- For the final layer, texture to match surrounding material (if applicable)
- Once partially cured, remove backing material
For larger holes (over 15mm):
- Clean thoroughly and dry completely
- Cut a patch from similar material slightly larger than the hole
- Position the patch inside the shoe behind the hole
- Apply Shoe Goo Clear around the edges of the patch to secure it
- Fill the visible hole with thin layers of Shoe Goo Clear
- Texture the final layer to match surrounding material
My most satisfying hole repair was saving my wife’s favorite white leather sneakers that had developed a wear hole where her big toe pressed against the upper. By using the backing technique and building up thin layers, I created a repair that was virtually invisible and lasted until she finally outgrew the shoes a year later.
Leather Luxury: Special Considerations for Using Shoe Goo Clear on Leather Footwear
As someone who appreciates quality leather shoes, I was initially hesitant to use any adhesive on my more expensive footwear. However, after carefully testing Shoe Goo Clear on an inconspicuous area, I’ve become confident using it on various leather shoe repairs.
When using Shoe Goo Clear on leather, I follow these special considerations:
- Leather Preparation:
- Clean with a leather-specific cleaner rather than alcohol (which can dry leather)
- Allow to dry completely (at least 24 hours if the leather got wet)
- For glazed leather, lightly scuff the repair area with very fine sandpaper
- For suede, brush the nap away from the repair area
- Application Technique:
- Apply in extremely thin layers
- Work the first layer into the leather fibers with a toothpick
- For visible repairs, final texture is crucial – while still tacky, press with material that matches the leather grain
- For color-matched repairs, consider adding a tiny amount of leather dye to the Shoe Goo Clear
- Post-Cure Treatment:
- After full cure, apply leather conditioner around (not on) the repair
- For glossy leather, a light buff with leather polish can help blend the repair
- For matte leather, a very light sanding with ultra-fine sandpaper can reduce shine
My most successful leather repair was fixing a tear in the upper of my favorite brown brogues. By applying micro-thin layers and texturing the final layer with a piece of similar leather while still tacky, I created a repair that’s virtually undetectable unless you know exactly where to look.
Flexibility Factor: Why Shoe Goo Clear’s Elasticity Matters
One of Shoe Goo Clear’s most important properties – and what sets it apart from many other adhesives – is its flexibility after curing. This elasticity is crucial for footwear, which constantly bends, twists, and flexes during normal use.
Through extensive testing (including deliberately bending and flexing repaired areas), I’ve found that properly cured Shoe Goo Clear:
- Can stretch approximately 30-40% without breaking
- Returns to its original shape after stretching
- Maintains flexibility even in cold temperatures
- Doesn’t crack or separate with repeated flexing
- Ages without becoming brittle
This flexibility is what allows Shoe Goo Clear repairs to withstand the dynamic stresses of walking and running. I’ve repaired the flexible collar area on running shoes, the bend point on dress shoes, and the flex zone of hiking boots – all areas that would quickly fail with a rigid adhesive.
My most impressive flexibility test was repairing the split side wall of my trail running shoes just before a 15-mile mountain race. The repair flexed perfectly through hundreds of foot strikes on uneven terrain without any sign of cracking or separation.
For maximum flexibility in your repairs:
- Apply in thin layers rather than one thick application
- Allow full cure time before subjecting to stress
- Avoid mixing with other adhesives that might reduce flexibility
- Consider the direction of flex when shaping your repair
Sneaker Salvation: Using Shoe Goo Clear on Athletic Footwear
Athletic shoes present unique repair challenges due to their specialized materials, frequent flexing, and exposure to moisture. Fortunately, Shoe Goo Clear excels at sneaker repairs, which is why it first gained popularity in skateboarding circles.
I’ve successfully used Shoe Goo Clear on various sneaker repairs:
- Reattaching separated soles
- Reinforcing toe caps before they wear through
- Fixing splits in the upper material
- Sealing mesh to prevent tear propagation
- Rebuilding worn tread patterns
- Reinforcing eyelets and lace areas
For athletic shoes specifically, I recommend:
- Extra thorough cleaning before application, as athletic shoes often have invisible salt and sweat residue
- Focusing on thin, flexible applications at flex points
- Using a textured tool to match the final surface to surrounding materials
- Allowing extra cure time if the shoes are frequently exposed to moisture
One of my most successful sneaker rescues was salvaging my son’s basketball shoes mid-season when the sole began separating at the toe. A strategic application of Shoe Goo Clear not only reattached the sole but reinforced the high-wear area enough to last through the remainder of the season.
Strength Showdown: How Clear Compares to Black in Durability
A common question I receive when recommending Shoe Goo Clear to friends is whether it’s as strong as the original black version. After years of using both products extensively, here’s my honest assessment:
In terms of adhesion strength (how well it sticks):
- Both products have identical bonding capabilities
- Both create a waterproof bond
- Both maintain flexibility after curing
In terms of abrasion resistance (how well it resists wearing away):
- Black Shoe Goo has a slight advantage for sole repairs
- Black Shoe Goo contains additional reinforcing compounds
- Clear sacrifices minimal durability for transparency
In terms of tear strength (resistance to propagating tears):
- Both products perform nearly identically
- Both maintain flexibility under stress
- Neither shows advantage in real-world testing
For practical purposes, I use:
- Black Shoe Goo for invisible repairs on black shoes and heavy-duty sole rebuilding
- Clear Shoe Goo for nearly everything else, accepting the minor durability trade-off for better aesthetics
My most demanding strength test was using both products on opposite shoes of the same pair (my work boots) to directly compare durability. After six months of daily wear, the black repair showed slightly less wear but both repairs remained fully functional – confirming that while there is a small difference, Clear is still more than strong enough for most repairs.
The Finish Line: Glossy or Matte After Application?
The final appearance of Shoe Goo Clear after curing is an important consideration, especially for visible repairs. Through experimentation, I’ve discovered that the default finish is glossy, but can be manipulated:
Natural Finish:
- Untextured Shoe Goo Clear dries with a noticeable glossy finish
- Thickness affects glossiness – thicker applications appear glossier
- The glossy finish becomes more noticeable on matte materials
Creating a Matte Finish:
- Apply Shoe Goo Clear as usual
- While still tacky (about 10-15 minutes after application), lightly press with:
- A piece of the same material as the shoe
- Fine sandpaper for a textured matte finish
- A lint-free cloth dabbed in cornstarch for a flat matte finish
- After full cure, very lightly sand with 600+ grit sandpaper if needed
I’ve found the finish particularly important when repairing suede or canvas shoes, where a glossy repair stands out dramatically. When repairing my daughter’s suede boots, I created a nearly perfect match by pressing a scrap piece of similar suede into the final layer while still tacky, transferring the texture perfectly.
For athletic shoes with specialized textures, I sometimes create custom texturing tools by embedding the actual shoe material on the end of a popsicle stick, allowing me to precisely match the surrounding texture.
Cosmetic Corrections: Using Shoe Goo Clear for Appearance Repairs
Beyond structural repairs, I’ve found Shoe Goo Clear excellent for purely cosmetic fixes that enhance the appearance of well-worn shoes:
Cosmetic applications I’ve successfully used:
- Filling and smoothing scuffs on leather dress shoes
- Creating a protective clear coat over scratched patent leather
- Sealing and preventing fraying on canvas edges
- Filling small cracks in vintage leather without changing color
- Restoring the glossy finish on worn areas of dress shoes
- Creating an invisible reinforcement on areas likely to wear through
For purely cosmetic applications, I focus on:
- Ultra-thin application (often wiping away excess with a cloth)
- Perfect texture matching through appropriate tools
- Careful blending at the edges of the repair
- Sometimes adding a tiny amount of matching shoe polish to the Shoe Goo Clear for color matching
My most satisfying cosmetic repair was restoring my vintage wingtips that had developed a network of fine cracks in the leather. By working Shoe Goo Clear into the cracks with a toothpick and carefully wiping the surface clean, I preserved the original patina while preventing further cracking. Several shoe enthusiasts have since complimented the “original condition” of shoes that secretly contain dozens of nearly invisible repairs.
When Good Goo Goes Bad: Removal Techniques for Mistakes
Despite my best efforts, I occasionally make application mistakes or need to remove old repairs. Through trial and error (mostly error), I’ve developed effective removal techniques for different situations:
For uncured Shoe Goo Clear:
- Act quickly – removal becomes exponentially more difficult as it cures
- Wipe immediately with a cloth dampened with mineral spirits
- For small amounts, acetone (nail polish remover) works well
- For sensitive materials, try isopropyl alcohol (90%+)
For partially cured Shoe Goo Clear:
- Freezing makes it more brittle and easier to chip away
- Gentle scraping with a plastic card can remove excess
- Repeated application of mineral spirits can gradually dissolve it
For fully cured Shoe Goo Clear:
- Freezing with ice cubes makes it brittle
- For complete removal, carefully apply a heat gun on low setting
- For leather, special care is needed – use leather-safe adhesive remover
- Mechanical removal (careful scraping) works better than solvents
My most challenging removal was after I accidentally dripped Shoe Goo Clear on the decorative perforations of my wingtips. After panicking briefly, I froze the area with an ice cube, then precisely chipped away the frozen adhesive with a wooden toothpick. The leather emerged unscathed, and I was able to proceed with the intended repair.
Kid-Friendly Fixes: Safety Considerations for Children’s Shoes
As a parent, safety is naturally my first concern when repairing my children’s shoes. After researching thoroughly and talking with the manufacturer, I’m confident that fully cured Shoe Goo Clear is safe for children’s footwear.
Important safety considerations:
- Uncured Shoe Goo Clear contains solvents – always apply in a well-ventilated area
- Allow absolutely full cure time (72+ hours) before letting children wear repaired shoes
- Wash hands thoroughly after application
- Keep the product away from children during application and curing
- Consider potential allergens – if your child has sensitive skin, test in an inconspicuous area first
I’ve repaired countless pairs of my children’s shoes over the years, including:
- Reattaching separated soles on school shoes
- Reinforcing toe areas on soccer cleats
- Fixing split seams on light-up sneakers
- Sealing holes in rain boots
- Reinforcing wear points on dance shoes
My most frequent repair is preemptively reinforcing the toe area of my son’s sneakers, as he somehow manages to wear through that specific spot within weeks. A thin, preventative application of Shoe Goo Clear has extended the life of his shoes by months, saving us from constantly buying replacements.
Beyond Footwear: Surprising Alternative Uses for Shoe Goo Clear
While designed specifically for footwear, I’ve discovered Shoe Goo Clear works brilliantly for many other household repairs:
Successful non-shoe applications I’ve used:
- Sealing small leaks in garden hoses
- Repairing split seams in waterproof gear
- Creating non-slip grips on tool handles
- Waterproofing seams on outdoor equipment
- Fixing cracked plastic cases and containers
- Repairing torn rubber or vinyl
- Reinforcing fraying backpack straps
- Creating a protective coating on frequently handled items
My most unusual application was creating custom grips on my kayak paddle by applying small dots of Shoe Goo Clear in a pattern. Not only did it provide excellent grip even when wet, but it has also withstood two seasons of salt water exposure without degradation.
The properties that make Shoe Goo Clear excellent for shoe repair – flexibility, waterproofing, abrasion resistance, and transparency – make it equally valuable for many other household applications where traditional adhesives might be too rigid or visible.
Finding Your Fix: Where to Purchase Shoe Goo Clear
When I first discovered Shoe Goo Clear, finding it locally was challenging. Today, it’s much more widely available, though you might need to look in unexpected places:
Reliable places to purchase Shoe Goo Clear:
- Sporting goods stores (especially those selling skateboarding equipment)
- Shoe repair shops
- Hardware stores
- Craft supply stores
- Online retailers
- Some well-stocked big box stores
- Outdoor/camping supply stores
In physical stores, I’ve found it in various departments:
- Shoe care section
- Adhesives aisle
- Sporting goods department
- Home repair section
I now keep tubes in strategic locations – my workshop, my travel kit, and even in my emergency car repair bag. After saving countless items over the years, I consider it an essential household product worth having readily available.
Light-Color Lifesaver: Why Clear is Superior for White and Pale Shoes
While Shoe Goo Clear works on all colors, it truly shines (metaphorically) on light-colored footwear. Through extensive testing, I’ve found it significantly superior to white Shoe Goo for several reasons:
Advantages for light-colored shoes:
- No yellowing over time (white Shoe Goo often yellows with UV exposure)
- Better blending with off-white and cream-colored materials
- Superior for multi-colored patterns that include white
- Less noticeable on textured materials
- Can be tinted with a tiny amount of acrylic paint for perfect color matching
My most challenging light-colored repair was my wife’s expensive cream leather pumps that had developed a tear along the side seam. White Shoe Goo would have been glaringly obvious, but Clear allowed me to create a nearly invisible repair that has held through multiple special occasions.
For white athletic shoes specifically, I sometimes mix a tiny amount of white acrylic paint into Shoe Goo Clear to create a custom repair compound that matches the slightly off-white color of aged athletic shoes better than pure white Shoe Goo.
The Last Step: Why Shoe Goo Clear Deserves a Place in Your Repair Kit
After years of experimenting with various footwear repair products, Shoe Goo Clear has earned its permanent place in my household repair arsenal. Beyond the obvious financial benefits of extending the life of expensive shoes, there’s something deeply satisfying about rescuing a favorite pair from the brink of disposal.
The true value of Shoe Goo Clear isn’t just in its adhesive properties – it’s in its ability to preserve the shoes that carry us through life’s most important moments. From the work boots that support you through long days to the special occasion shoes that witness life’s celebrations, every pair tells a story worth extending.
I started this journey with a desperate attempt to save my favorite sneakers. Now, dozens of successful repairs later, I find myself voluntarily inspecting friends’ and family members’ footwear for repair opportunities – sometimes to their initial alarm and eventual gratitude.
So the next time you notice a beloved pair of shoes beginning to fail, remember that with a tube of Shoe Goo Clear, some patience, and the techniques I’ve shared, you might be surprised at what you can save from the trash bin. Your shoes – and your wallet – will thank you.