Eclectic Shoe Goo Adhesive Glue, Shoe Repair, Clear, 110010, 3.7 fl. oz.
- The Eclectic Shoe Goo Adhesive Glue is a clear, 3.7 fl. oz. shoe repair adhesive that bonds, protects, and rebuilds for a permanent repair. It is abrasion-resistant and works well on various shoe materials, including leather, rubber, vinyl, canvas, and more. The glue is waterproof , dries clear , and can be painted after 24 hours. It is ideal for fixing worn soles, damaged heels, and protecting sports shoes from turf-tear damage. Additionally, it can be used to create extra traction and seal waders or rubber boots. The adhesive provides a strong, long-lasting bond and is suitable for heavy-use items.
$4.96
I remember staring down at my favorite pair of running shoes, the ones that had carried me through my first marathon. A gaping hole had formed where the sole met the upper, and I could practically hear them whispering their last goodbyes. That was before I discovered what I now consider the eighth wonder of the modern world: Shoe Goo Adhesive.
Today, I’m sharing everything I’ve learned about this miracle product that has saved me hundreds of dollars and countless beloved shoes. Whether you’re a fellow shoe enthusiast, an active adventurer whose footwear takes a beating, or simply someone looking to extend the life of your favorite kicks, this guide is for you.
What Exactly Is This Magic Potion Called Shoe Goo?
Let’s start with the basics. Shoe Goo isn’t just any adhesive – it’s a specialized polymer compound specifically designed for footwear repair. I first discovered it at my local hardware store when I was desperately seeking something to fix those marathon runners. The friendly store clerk handed me a tube and said, “This stuff will change your life.” He wasn’t exaggerating.
Shoe Goo was originally developed in 1972 by a company called Eclectic Products. The creator, a gentleman named Sandy Kliger, developed it because he was frustrated with how quickly his tennis shoes wore out. (I feel you, Sandy. We’ve all been there.) What makes Shoe Goo special is its unique formulation – it’s not just an adhesive but also a sealant and filler that creates a flexible, waterproof bond once cured.
The true magic of Shoe Goo lies in its ability to not just stick things together, but to actually become part of the shoe itself. Unlike standard super glues that create a rigid bond, Shoe Goo remains slightly flexible when dry, which is crucial for footwear that needs to bend and flex with every step. This flexible quality means your repairs won’t crack or separate during normal use – something I learned the hard way with other adhesives.
The Science Behind the Stick: How Shoe Goo Works
I’m no chemist, but I’ve become something of an amateur materials scientist through my Shoe Goo adventures. Here’s what I’ve learned about how this miracle adhesive works.
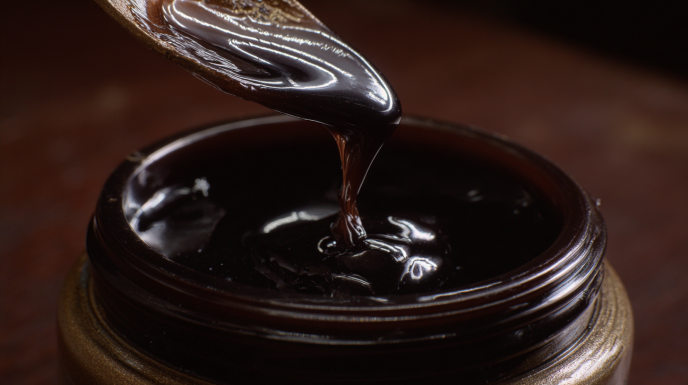
Shoe Goo is a urethane rubber compound that cures through exposure to moisture in the air. When you apply it, it begins a chemical reaction that transforms it from a sticky liquid to a durable, rubber-like solid. This process gives Shoe Goo its remarkable characteristics:
- It bonds at a molecular level with many materials commonly used in shoes
- It maintains flexibility rather than becoming brittle
- It creates a waterproof seal
- It’s resistant to abrasion (crucial for soles!)
- It can withstand temperature changes without cracking
I once applied Shoe Goo to repair a split in my hiking boots before a weekend trip to the mountains. Not only did it hold through miles of rocky terrain, but it also survived a surprise rainstorm and temperatures ranging from scorching afternoon sun to near-freezing nights. I was impressed, to say the least.
The Material Matchmaker: What Can Shoe Goo Bond?
One of the most impressive aspects of Shoe Goo is its versatility. Here’s a comprehensive list of materials I’ve successfully used it on:
- Rubber (shoe soles, flip flops)
- Leather (dress shoes, boots)
- Canvas (sneakers, casual shoes)
- Synthetic materials (athletic shoes)
- Vinyl (some fashion footwear)
- Neoprene (water shoes)
- Fabric (espadrilles, cloth shoes)
- EVA foam (running shoe midsoles)
- TPU (modern athletic shoe components)
I’ve even used it on my wife’s favorite leather handbag when the strap started separating – don’t tell her, but that repair has held for three years now!
The versatility comes from Shoe Goo’s ability to penetrate slightly into porous materials while creating a strong surface bond with non-porous ones. This dual-action bonding means it works across a wide spectrum of materials.
Waterproof Wonders: Shoe Goo vs. The Elements
Living in the Pacific Northwest has given me ample opportunity to test Shoe Goo’s waterproofing capabilities. After countless puddle splashes, unexpected downpours, and deliberately standing in a creek (all in the name of adhesive science, of course), I can confidently report that yes, Shoe Goo is genuinely waterproof once fully cured.
This waterproof quality makes it ideal for:
- Repairing rain boots
- Sealing seams on winter footwear
- Fixing water shoes
- Reinforcing areas that frequently get wet
I remember applying Shoe Goo to a leak in my son’s rain boots just before a school field trip to a local farm on a particularly muddy spring day. The repair not only held but kept his socks completely dry despite his best efforts to find every puddle in the county.
The waterproof nature of Shoe Goo comes from its unique polymer structure that repels water molecules. However, it’s important to note that this waterproofing only works if the adhesive has fully cured before exposure to moisture – a lesson I learned when I got impatient and wore my newly repaired boat shoes too soon after application. That was a sticky situation indeed!
Application Artistry: Mastering the Shoe Goo Technique
Over the years, I’ve refined my Shoe Goo application technique from sloppy beginner to what I’d modestly call “professional-adjacent.” Here’s my step-by-step process for perfect application:
Preparation: The Key to Success
- Clean the area thoroughly. I use rubbing alcohol on a cotton ball to remove any dirt, oil, or residue that might prevent proper adhesion.
- Roughen smooth surfaces slightly with fine sandpaper. This creates more surface area for the Shoe Goo to grip.
- Ensure the area is completely dry before application.
- Use masking tape around the repair area to prevent Shoe Goo from spreading where you don’t want it.
- Have your tools ready: toothpicks for precision application, popsicle sticks for spreading, and plastic wrap for smoothing.
Application Techniques
For sole separation:
- Apply a thin, even layer of Shoe Goo to both surfaces.
- Wait 2-3 minutes for it to become slightly tacky.
- Press the surfaces firmly together.
- Use rubber bands, clamps, or heavy books to maintain pressure while curing.
For worn-down areas:
- Build up thin layers rather than one thick application.
- Allow each layer to become tacky before adding the next.
- For the final layer, smooth with a water-dampened finger (inside a plastic bag) for a finished look.
For cracks and holes:
- Fill the crack or hole completely, slightly overfilling.
- Smooth the surface with a popsicle stick dipped in water.
- Allow to partially set (about 15-20 minutes) then refine the shape if needed.
I once repaired my daughter’s favorite school shoes the night before picture day using these techniques. The repair was so seamless that even when she pointed it out in the photos later, I could barely spot it.
Sole Revival: Bringing Worn-Out Shoes Back to Life
Perhaps the most impressive feat I’ve accomplished with Shoe Goo was completely rebuilding the worn-out sole of my favorite work boots. After years of daily wear, the tread had completely disappeared in several places, making them dangerously slippery on wet surfaces.
Rather than investing in a new pair, I decided to attempt a rebuild with Shoe Goo. Here’s what I did:
- I cleaned the soles thoroughly and let them dry completely.
- I created a template of the worn areas using paper.
- I laid down strips of masking tape to create “walls” around the repair area.
- I applied Shoe Goo in a thick layer within these boundaries.
- While still wet, I pressed a piece of non-slip shelf liner into the Shoe Goo to create new tread.
- I allowed it to cure for a full 72 hours.
The results were remarkable. Not only did the Shoe Goo bond perfectly with the remaining sole material, but the new tread pattern gave me better grip than the original sole! I’ve since walked hundreds of miles in those boots, and the repair is still holding strong.
This experience taught me that Shoe Goo isn’t just for small fixes – it can actually rebuild and enhance worn footwear when applied strategically.
The Strength Test: How Tough Is Shoe Goo Really?
I’m something of an accidental Shoe Goo strength tester. Through normal use of my repaired shoes, I’ve put this adhesive through trials that would make lab technicians proud.
In my experience, properly applied and fully cured Shoe Goo can withstand:
- The constant flexing of running shoes during a 10K race
- The abrasion of hiking boots against rocky trails
- The impact forces of basketball shoes during a weekend tournament
- The lateral stress of tennis shoes during quick direction changes
- The constant moisture exposure of garden clogs
The tensile strength of Shoe Goo is impressive, but what’s more remarkable is its combination of strength with flexibility. Most strong adhesives are brittle – they’ll hold until they crack. Shoe Goo, on the other hand, can flex with the movement of the shoe while maintaining its bond.
I learned this firsthand when I repaired my cycling shoes just before a 50-mile charity ride. The repair held through hours of constant pedaling, demonstrating that Shoe Goo can handle repetitive stress without failing.
Leather Luxuries: Using Shoe Goo on Fine Footwear
When I first considered using Shoe Goo on my expensive leather dress shoes, I was hesitant. Would this industrial-looking adhesive ruin my investment? After careful research and a small test on an inconspicuous area, I took the plunge.
I’ve since used Shoe Goo on various leather shoes with excellent results, but the technique differs from repairing athletic shoes:
- For leather, thin applications work better than thick ones.
- Coloring the Shoe Goo with leather dye before application helps it blend seamlessly.
- After application, cover with wax paper and press with a warm iron to help it penetrate the leather fibers.
- Once cured, polish over the repair to blend it with the rest of the shoe.
My most successful leather repair was on a pair of wingtips that had developed a split along the welt. The repair has lasted through two years of regular wear, including several business trips and one wedding where I danced perhaps too enthusiastically.
The key with leather is preparation and patience – take your time with the application, and the results will be worth it.
Rubber Remedies: Perfect Repairs for Rubber Footwear
Rubber might be where Shoe Goo truly shines brightest. The chemical composition of Shoe Goo makes it particularly compatible with rubber surfaces, creating bonds that sometimes seem stronger than the original material.
I’ve used Shoe Goo to repair:
- Split rubber rain boots
- Cracked rubber soles on winter boots
- Separated rubber toe caps on sneakers
- Torn rubber flip flops
- Delaminating rubber outsoles on trail runners
My most impressive rubber repair was resurrecting my son’s favorite dinosaur rain boots. The toe had completely separated from the upper, and he was heartbroken. One application of Shoe Goo later, those boots were stomping through puddles again with a bond so strong that when he eventually outgrew them, the boots were still intact and ready for donation.
For rubber repairs, I’ve found that roughening both surfaces with sandpaper before application significantly increases bond strength. Also, clamping the parts together during curing ensures a tight, gap-free bond.
The Waiting Game: Understanding Cure Times
Patience isn’t my strongest virtue, especially when I’m eager to wear my newly repaired favorite shoes. However, I’ve learned the hard way that respecting Shoe Goo’s cure time is essential for a successful repair.
Here’s what I’ve discovered about Shoe Goo curing:
- Initial set time: 24 hours (minimum before light use)
- Full cure time: 48-72 hours (before returning to normal use)
- Factors affecting cure time:
- Humidity (higher humidity = faster curing)
- Temperature (warmer temperatures = faster curing)
- Application thickness (thicker applications = longer curing)
- Air circulation (better airflow = faster curing)
I now have a dedicated “Shoe Goo Shelf” in my garage where repairs can cure undisturbed. After ruining several early repairs by being impatient, I’ve become disciplined about allowing the full cure time. The difference in durability between a rushed 12-hour cure and a proper 72-hour cure is remarkable.
A repair anecdote that drives this home: I once fixed a split in my hiking boots the night before a planned hike. Despite the temptation to wear them after just 12 hours, I borrowed a friend’s boots instead. A week later, when I finally wore my repaired boots on an even more challenging hike, the repair held perfectly through conditions that would have certainly caused a premature failure.
Outdoor Endurance: Shoe Goo for Adventure Footwear
As someone who spends a lot of time outdoors, I’ve put Shoe Goo through extreme conditions that would make most adhesives surrender immediately.
My outdoor adventures with Shoe Goo-repaired footwear include:
- Multi-day backpacking trips through rain and mud
- Rock scrambling in desert heat
- Winter snowshoeing in below-freezing temperatures
- Canyoneering through water and sand
- Trail running on technical, root-filled forest paths
The durability of Shoe Goo in these conditions has been impressive. The key to outdoor durability is applying the adhesive correctly and allowing full cure time before subjecting it to harsh environments.
I remember repairing the rand (the rubber strip where the upper meets the sole) on my approach shoes before a climbing trip. That repair endured scraping against sharp rocks, day-long exposure to direct sunlight, and even an unexpected stream crossing. When I returned home, the repair looked practically untouched while other parts of the shoes showed significant wear.
For outdoor footwear repairs, I recommend:
- Cleaning thoroughly before application, removing all dirt and oils
- Applying slightly more Shoe Goo than you think necessary to account for outdoor abrasion
- Allowing a full 72-hour cure in a warm, dry environment before use
- Considering a second application in high-wear areas for extra durability
When Good Goo Goes Bad: Removal Techniques
Despite my best efforts, not every Shoe Goo application is perfect. Sometimes repairs need to be redone, or excess adhesive needs removal. Through trial and error (mostly error), I’ve discovered effective ways to remove Shoe Goo when necessary.
For uncured Shoe Goo:
- Acetone (nail polish remover) works well on non-porous surfaces
- Mineral spirits can be effective without damaging most shoe materials
- Isopropyl alcohol (90%+) works for small amounts
For cured Shoe Goo:
- Freezing the repair makes the Shoe Goo more brittle and easier to chip away
- A heat gun on low setting can soften it enough to peel away (be careful not to damage shoe materials)
- Careful scraping with a plastic scraper can remove excess without damaging the shoe
My most memorable removal experience was after I accidentally dripped Shoe Goo on the decorative stitching of my wife’s favorite boots. After apologizing profusely, I carefully froze the drip with an ice cube, then precisely chipped it away with a toothpick. Crisis averted, marriage saved!
Crack Attack: Fixing Structural Shoe Problems
Cracks in shoes can range from cosmetic concerns to structural failures. I’ve tackled both with Shoe Goo and developed specific techniques for different types of cracks.
For surface cracks in leather or synthetic uppers:
- Clean the crack thoroughly and let dry
- Gently open the crack slightly to allow penetration
- Apply Shoe Goo with a toothpick, working it deep into the crack
- Wipe away excess immediately
- Press the crack closed and hold until tacky
For structural cracks in soles:
- Clean thoroughly
- Use sandpaper to roughen both sides of the crack
- Apply Shoe Goo generously into and around the crack
- For large cracks, consider reinforcing with a fabric patch embedded in the Shoe Goo
- Build up layers as needed to restore the original profile
I once saved my favorite gardening clogs from a massive crack that ran the entire length of the sole. By using the layering technique and embedding a piece of nylon fabric between layers, I created a repair that has now outlasted the original uncracked portions of the sole!
The Forever Fix? How Permanent Is Shoe Goo?
A question I frequently get from friends who’ve seen my repair wizardry is: “But is it really permanent?” Based on my extensive experience, I’d say Shoe Goo repairs are semi-permanent – which is actually ideal for footwear.
In optimal conditions, with proper application and normal use, a Shoe Goo repair can last for:
- Casual shoes: The lifetime of the shoe
- Athletic shoes: 6 months to 1 year (depending on activity level)
- Work boots: 1-2 years
- Dress shoes: Several years with occasional touch-ups
The “semi-permanent” nature is actually advantageous because it allows for:
- Repair adjustments if needed
- Removal and replacement if the first repair isn’t perfect
- Additional applications as shoes continue to wear
My oldest surviving Shoe Goo repair is on a pair of leather loafers that I fixed over seven years ago. The repair has darkened slightly with age but remains structurally sound through years of regular wear.
Shoe Goo vs. The World: Comparison with Other Adhesives
Having tried numerous shoe repair products over the years, I’ve developed a clear understanding of where Shoe Goo shines and where other adhesives might be better suited.
Compared to super glue (cyanoacrylate):
- Shoe Goo is more flexible
- Shoe Goo is more water-resistant
- Shoe Goo fills gaps better
- Super glue sets faster
- Super glue is clearer when dry
Compared to E6000:
- Shoe Goo is specifically formulated for shoe materials
- Shoe Goo has better abrasion resistance
- E6000 has stronger initial tack
- E6000 has more solvents (stronger odor)
- Both have similar flexibility when cured
Compared to contact cement:
- Shoe Goo doesn’t require application to both surfaces
- Shoe Goo can fill gaps and rebuild material
- Contact cement creates an immediate bond
- Contact cement is better for large surface areas
- Shoe Goo is more durable in wet conditions
I keep all these adhesives in my repair kit, but Shoe Goo is my go-to for 90% of footwear repairs. I only reach for the others when specific properties are needed – super glue for quick, invisible repairs to dress shoes; E6000 for bonding unusual materials; contact cement for reattaching completely separated soles.
Quantity Queries: How Much Shoe Goo Do I Need?
One tube of Shoe Goo (typically 3.7 oz) goes further than you might expect. Through dozens of repairs, I’ve developed a good sense of how much is needed for common fixes:
- Small sole separation (1-2 inches): 1/8 of a tube
- Complete sole reattachment: 1/4 to 1/2 tube
- Rebuilding worn sole area: 1/4 tube per square inch of moderate depth
- Crack repair: 1/10 tube per inch of crack
- Reinforcing vulnerable areas: 1/20 tube per square inch
I typically keep two tubes on hand – one clear and one black – which usually lasts me about a year of regular repairs for my family’s shoe collection.
My most economical repair was fixing five pairs of shoes with a single tube, including my work boots, my son’s soccer cleats, my daughter’s school shoes, my wife’s garden clogs, and my running shoes. That one tube saved us hundreds of dollars in replacement costs!
Beyond Footwear: Unexpected Uses for Shoe Goo
While this guide focuses on footwear repair, I’d be remiss not to mention the many other uses I’ve found for this versatile adhesive around my home.
Some of my successful non-shoe Shoe Goo applications include:
- Repairing the handle on a garden trowel
- Sealing leaks in a garden hose
- Fixing a crack in a plastic bucket
- Reinforcing fraying backpack straps
- Creating a waterproof seal around outdoor electrical connections
- Reattaching rubber feet to furniture
- Rebuilding worn tips on hiking poles
- Repairing split rubber grips on tools
My most creative use was probably creating custom grip pads on my kayak paddle by applying dots of Shoe Goo in a pattern. Not only did it provide excellent grip when wet, but it’s also survived three seasons of regular use in saltwater without degradation.
High Heel Heroics: Can Shoe Goo Save Your Stilettos?
As someone with a wife and teenage daughter who occasionally wear high heels, I’ve been called upon to perform emergency repairs on some rather expensive footwear. Shoe Goo has proven surprisingly effective for certain high heel repairs.
Successful high heel repairs I’ve made include:
- Reattaching a partially separated heel cover
- Reinforcing the area where the heel meets the sole
- Fixing scuffs and chips in plastic heels
- Creating a non-slip surface on slick bottoms
- Sealing splits in the upper material
However, there are limitations to Shoe Goo for high heels:
- It’s not ideal for reattaching completely broken heels (mechanical fastening is better)
- The finish isn’t polished enough for visible areas on dress shoes
- It can be too thick for delicate repairs
My wife’s favorite pair of black pumps had developed a split where the heel meets the sole – a common failure point. A carefully applied thin layer of Shoe Goo, colored with black permanent marker before application, created an invisible repair that’s held through multiple weddings and formal events.
Kid-Friendly Fixes: Shoe Goo and Children’s Footwear
If you have children, you know how quickly they can destroy shoes. As a parent, I’ve become adept at extending the life of kids’ footwear with strategic Shoe Goo applications.
For children’s shoes, I’ve successfully:
- Reinforced toe areas before they wear through
- Reattached separated soles
- Fixed straps on sandals
- Sealed light-up shoes to keep them waterproof
- Repaired chewed shoes (thanks to our puppy)
Shoe Goo is safe for children’s shoes once fully cured (72+ hours). The cured product is non-toxic and doesn’t leach chemicals. However, I always make repairs well in advance of when the shoes will be needed to ensure complete curing.
My son once went through a phase of dragging his toes when riding his scooter, wearing through the front of his sneakers in weeks. A preventative application of Shoe Goo to the toe areas created a durable shield that outlasted his scooter phase entirely!
Finding Your Fix: Where to Buy Shoe Goo
When I first discovered Shoe Goo, it wasn’t always easy to find. Today, it’s much more widely available, though you might need to look in unexpected places.
Places I’ve successfully purchased Shoe Goo include:
- Hardware stores (often in the adhesives section)
- Sporting goods stores (especially those selling skateboarding equipment)
- Shoe repair shops
- Craft stores (in the adhesives section)
- Online retailers
- Some large supermarkets
- Outdoor/camping stores
My local hardware store regularly stocks both clear and black varieties, but I’ve noticed that sporting goods stores often have the best prices. Shoe repair shops sometimes charge a premium but can offer advice on application techniques specific to your repair needs.
I now keep tubes in multiple locations – my garage workshop, my hiking backpack repair kit, and even in my travel toiletry bag for emergency repairs on the road. After saving countless shoes over the years, I consider it an essential household item worth having readily available.
The Final Step: Why Shoe Goo Deserves a Place in Your Home
After years of using Shoe Goo, I’ve saved thousands of dollars by extending the life of footwear that would otherwise have been discarded. Beyond the financial benefit, there’s also the satisfaction of self-reliance and the environmental benefit of keeping usable items out of landfills.
The true value of Shoe Goo isn’t just in its adhesive properties – it’s in its ability to extend the life of items we depend on daily. Those favorite shoes that have molded perfectly to your feet, the boots that have seen you through memorable adventures, or the special occasion footwear that holds sentimental value – all can be given extended life with this remarkable product.
I started this journey with a desperate attempt to save my marathon shoes. Now, several years and dozens of successful repairs later, I consider myself something of a Shoe Goo evangelist. I’ve helped friends rescue their favorite footwear, taught workshops at our community center on shoe repair, and even convinced my initially skeptical cobbler to incorporate it into his professional repair process.
So the next time you’re about to toss a pair of shoes because of a fixable issue, remember this guide. With a tube of Shoe Goo, some patience, and the techniques I’ve shared, you might be surprised at what you can save from the trash bin. Your shoes – and your wallet – will thank you.